PIP is a package management system used to install and manage software packages/libraries written in Python.
Windows
1. Download Python Executable Installer
Open your web browser and navigate to the Downloads for Windows section of the official Python website.
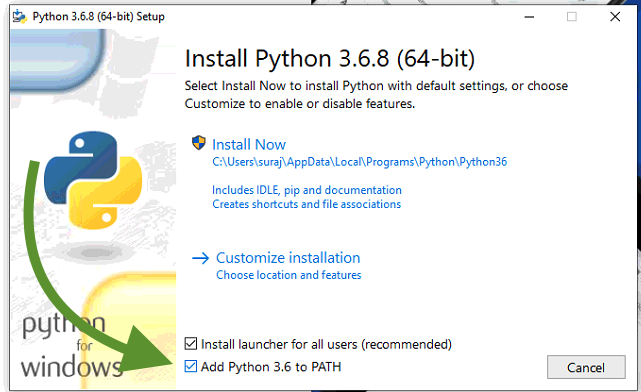
2. Run the Python Installer once downloaded (In this example, we have downloaded Python 3.6.8.)
Make sure you select the Install launcher for all users and Add Python 3.6 to PATH checkboxes
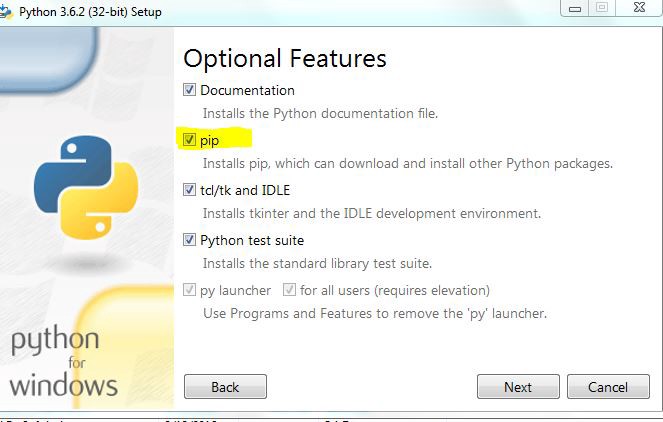
3. Make sure ‘pip‘ checkbox checked
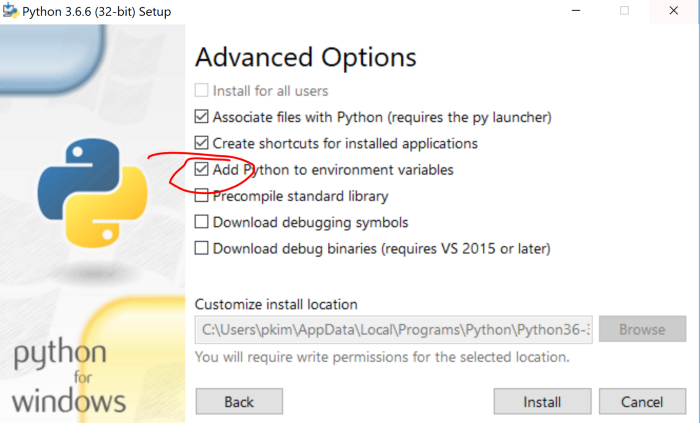
4. Check that you’ve checked the box for adding Python to Environment variables
5. Verify Python and Pip on Terminal
$ python -v$ pip -vUbuntu
1. Start by updating the packages list and installing the prerequisites
$ sudo apt update
$ sudo apt install software-properties-common
2. Add the deadsnakes PPA to your sources list
$ sudo add-apt-repository ppa:deadsnakes/ppa
3. Install Python 3.7
$ sudo apt install python3.7
4. Installing pip for Python 3
$ sudo apt update
$ sudo apt install python3-pip
5. Verify Python and Pip on Terminal
$ python3$ pip3MacOS
1. First, we need install Homebrew, open Terminal or your favorite OS X terminal emulator and run
$ /bin/bash -c "$(curl -fsSL https://raw.githubusercontent.com/Homebrew/install/master/install.sh)"2. Now, we can install Python 3
$ brew install python3. Verify Python and Pip on Terminal
$ python3$ pip3